
From Drab to Fab: A Playhouse Renovation You've Got To See
My husband and I always joke that any project I touch is destined to be much more complicated than it should be. Usually, he is very right. So when I started the conversation of building a playhouse for Brody, we knew we were in for some work. What we did not realize was how much fun we would have as a family creating this little play space and watching Brody enjoy it.

We started with a build-your-own playhouse kit. The Backyard Discovery Timberlake Cedar Wood Playhouse seemed to be more affordable and less time consuming than trying to build our own design. When we initially opened the box, we were a bit concerned it may be tough to put together, but once we started taking the pieces out we were pleasantly surprised by how easy it was to build.
To transform the playhouse into a Palm Springs inspired juice bar, we focused on three main changes: painting, extending the side window, and decorating the playhouse. Below, I am spilling the beans on how we spiced up the playhouse. I won’t sugar coat it, the painting process took much longer than planned—a rough first trimester could be partially to blame. But the final results of this playhouse renovation were more than worth the effort!

Painting The Playhouse
Since we had recently painted our block wall fence a charcoal color, I knew I wanted to paint the playhouse white. The playhouse is the first thing you see when you look out of the kitchen window and I wanted to be sure it was not an eyesore. We used Behr Ultra Pure White in an eggshell finish. Per the paint counter attendant, the eggshell finish would give us a little more wipe-ability on the exterior, while still appearing fairly flat.

We debated how to paint the pieces. Should we paint each piece before we build the house? Should we build the whole house then paint it? Should we do a combo of both? We ultimately decided to build the house without the roof and paint the home separately from the roof pieces. Was this the best strategy? I am not sure, but it worked. Some of the pieces overlapped others, so we avoided painting unnecessary areas. Since we used white, it took a solid 3 coats in most areas to make sure it fully covered the cedar wood. When we finished the first coat, I looked at the house and wanted to quit because it looked awful. But we kept on trekking and by the time the 3rd coat was applied, we were happy.
Tip: follow the wood grain with your brush strokes for best results.
It was difficult to paint in some of the crevices. Once we assembled the entire playhouse, I went around with a can of white spray paint and tried to fill in most of the little areas that we had missed with paint. I highly recommend doing this.
Building An Awning
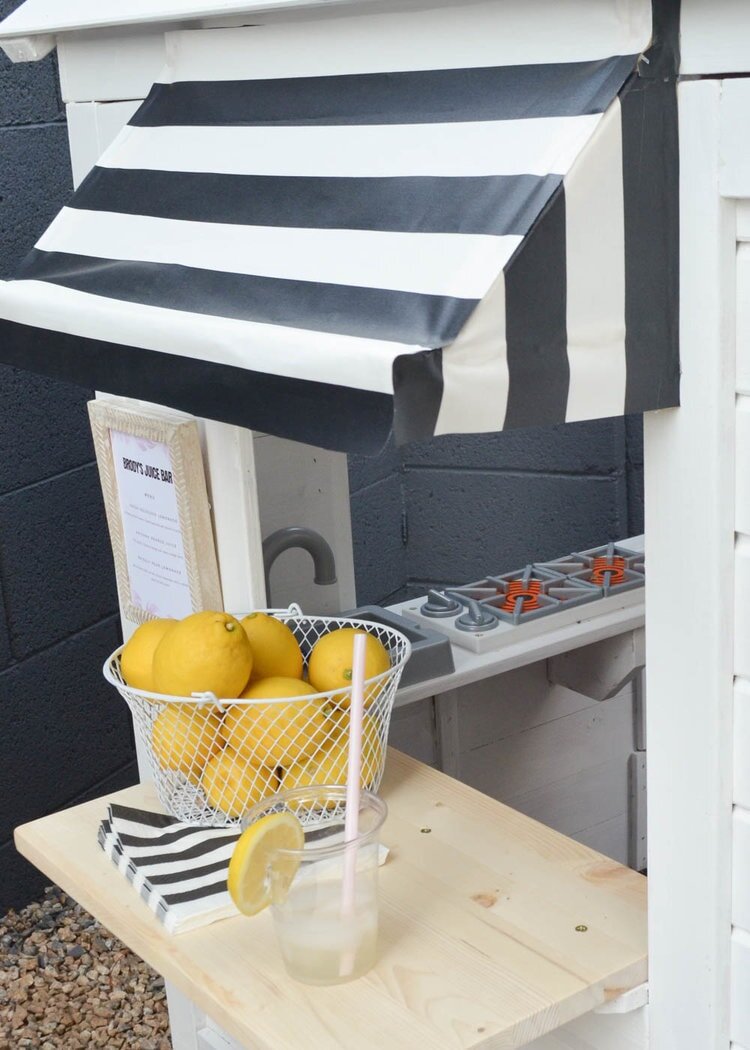
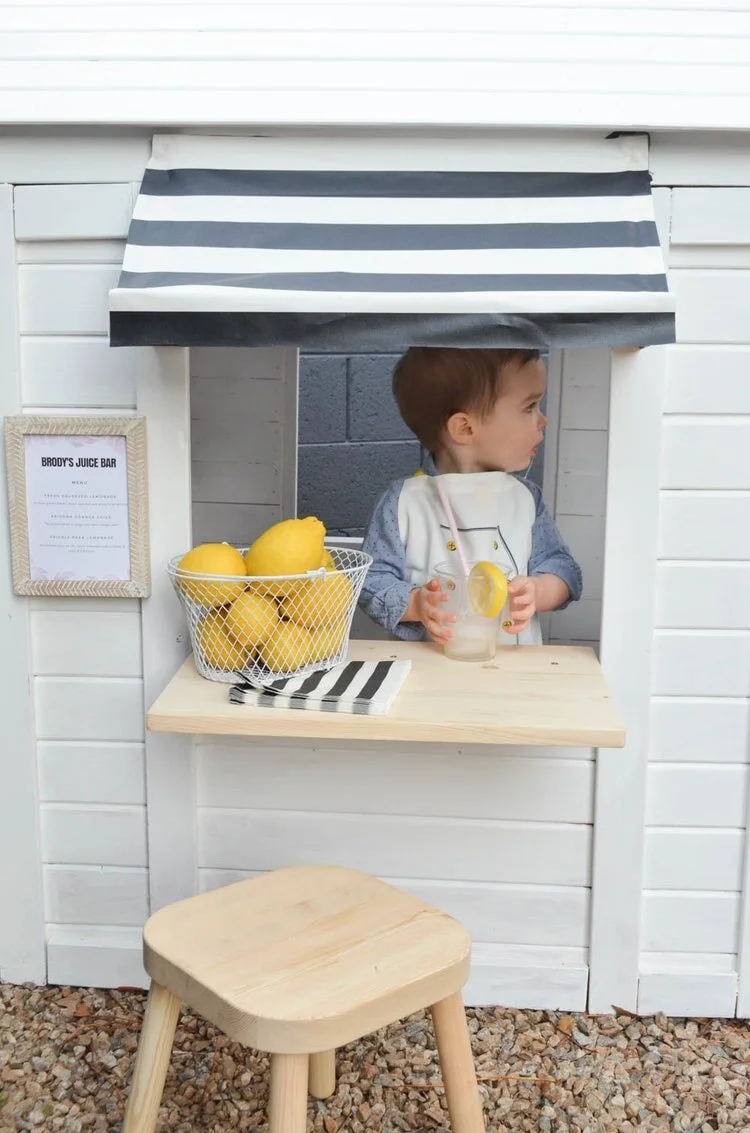
After we finished tackling the painting (nearly 3 months later!), we spent a weekend working on the fun part—customizing the playhouse! Since the interior of the playhouse is small, there is not a lot of room for a table or counter space. We decided to transform the windowsill on one of the sides to create a little counter/table. We simply drilled a sanded piece of birch wood into the windowsill to create the counter space (thanks, dad, for your handiwork on this!). I do plan on adding a varnish or finish to the counter in the next few weeks before it rains.
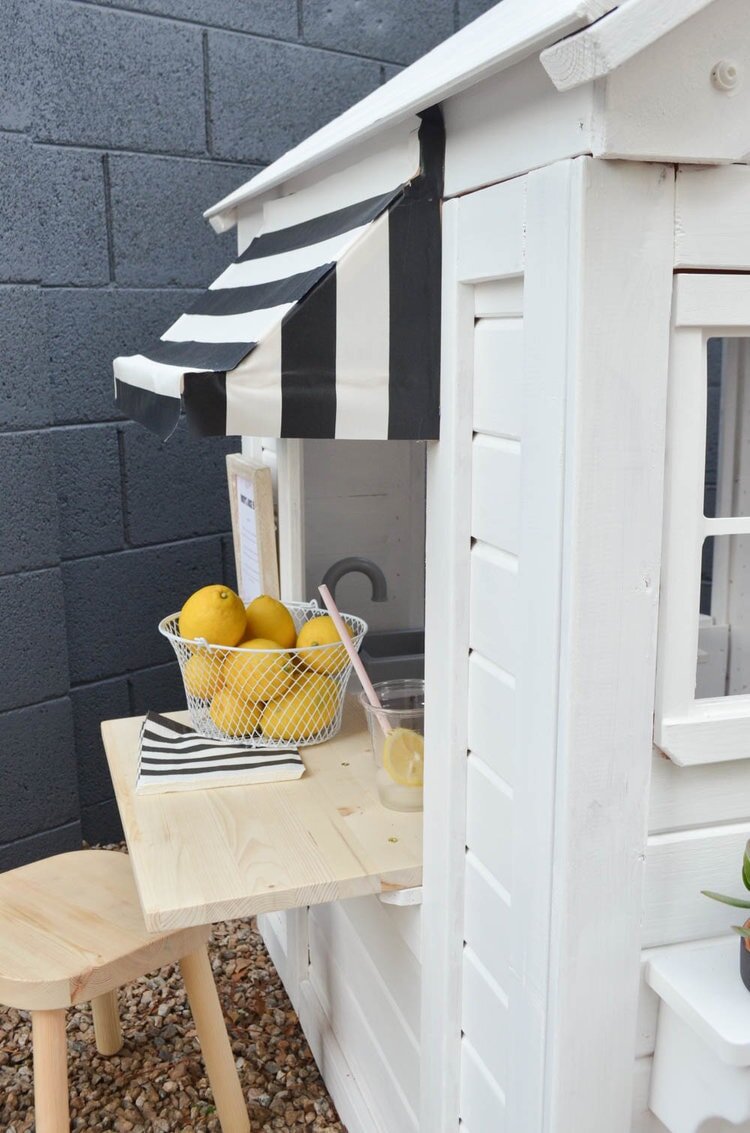
To make the side look more customized, we built an awning. If it sounds intimidating, it was not. We simply secured two shelf brackets from Ikea to the side of the window frame and covered it with a striped fabric. Since I do not sew, I hot glued the fabric to the brackets. It has been holding up well so far—the lovely Arizona weather may be a contributing factor.


Decorating The Playhouse
As for decorating the playhouse, we used a washable Ikea rug at the entrance. This rug is under $4, so if it gets destroyed over time, I am not worried. We painted terracotta pots black and planted succulents to dress up the front. You could also use faux plants, but I am learning that toddlers love gardening. Hopefully Brody’s gardening skills are much better than mine.
We put a stool on the side by the window table. Brody alternates between sitting on the stool and playing in the house—it is so fun to watch. I am planning on bringing a container of play food outside for him to use, but in the meantime cups and rocks have been quite entertaining
We had so much fun building this little house. I am hoping it brings years of fun to our kids! Now who wants to come over for some lemonade and a play date?
Get the look:
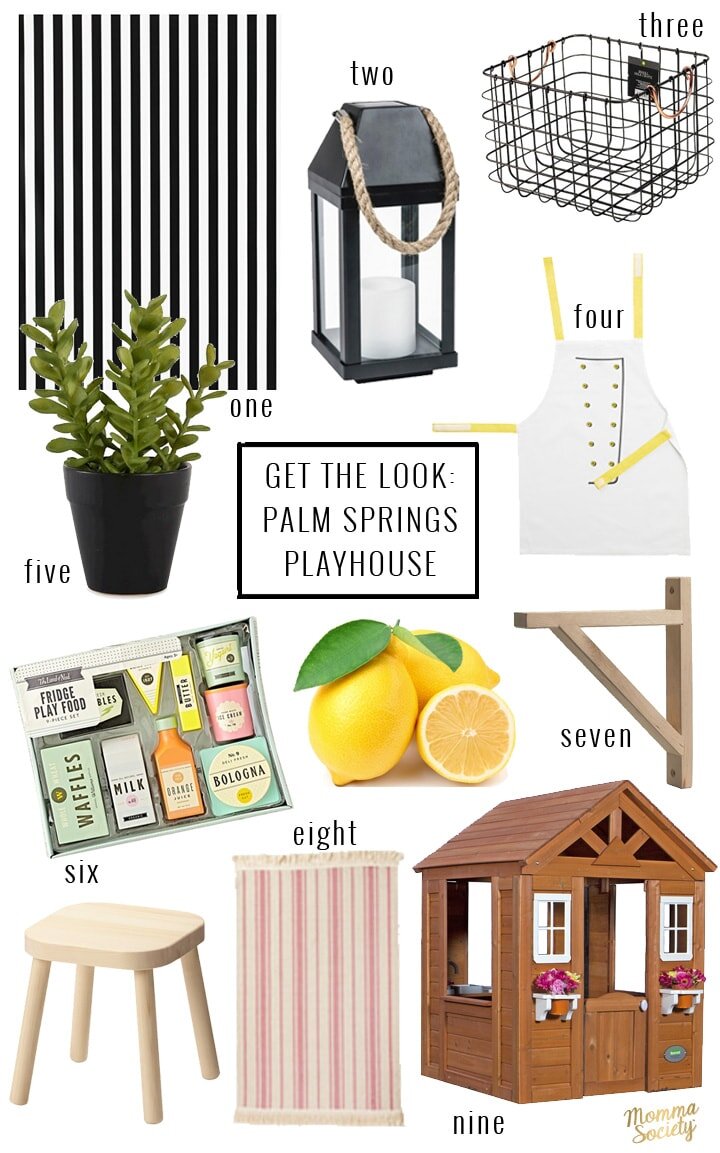
One: Plastic Coated Striped Fabric | Two: Outdoor Lantern | Three: Milk Crate Wire Basket | Four: Children's Apron Set | Five: Artificial Succulent Plant | Six: Wooden Play Food | Seven: Wooden Children's Stool | Eight: Flatwoven Ikea Rug | Nine: Backyard Discovery Timberlake Cedar Wood Playhouse
For more pictures of the playhouse, check out this post on Project Nursery.